.png)

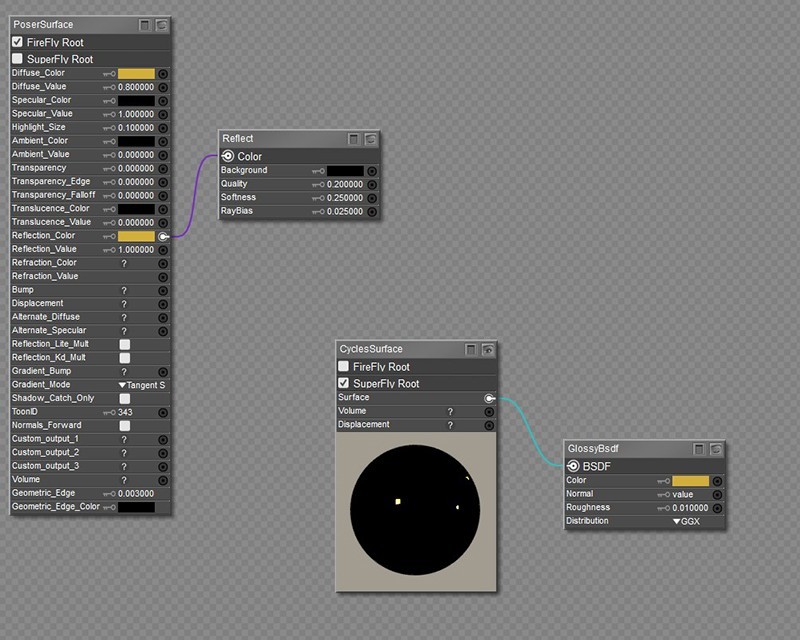
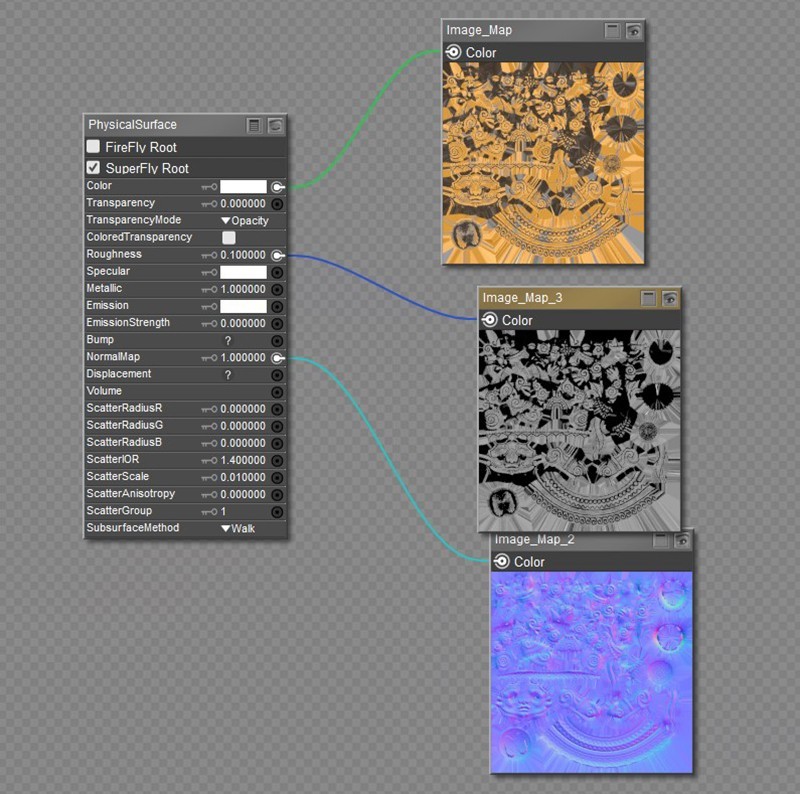
We have previously talked about Poser’s SuperFly renderer, our photo-realistic renderer grounded on the Blender Project’s Cycles engine, more specifically, Cycles X, the latest iteration of this render engine. SuperFly uses PBR (physically based rendering) technology, developed to reproduce the look of real-world materials using various parameters.
If you are new to Poser or new to the SuperFly engine, I would like to share some tips to get you started. The best way to start is to grab one of the existing materials from the Poser Library (you can obtain some materials by downloading the P13 Bonus Materials pack from the Purchases tab). Starting from a pre-existing material can save you some work, but can also be a very valuable learning resource as you can see how the material was built.
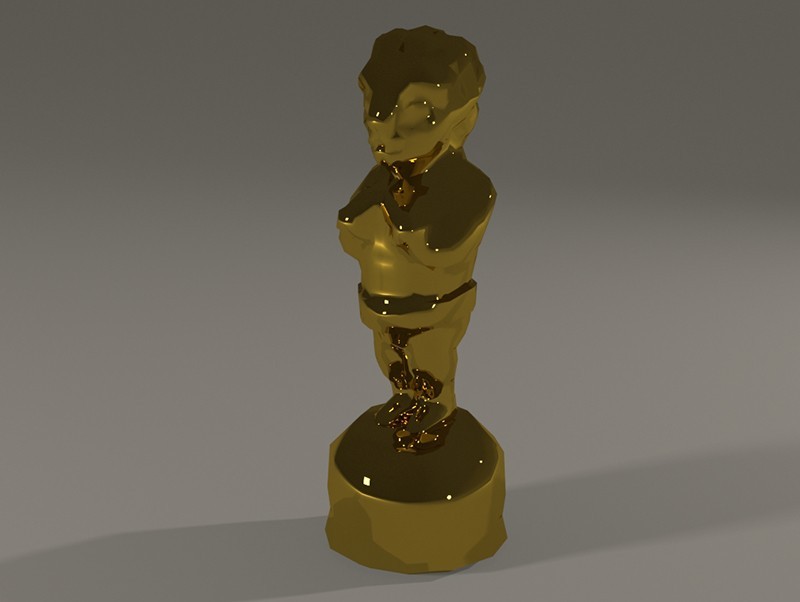
In my case, I loaded the “Gold” material from the “SuperFly Basics” Material Library. I am applying the material to a statue model I have.
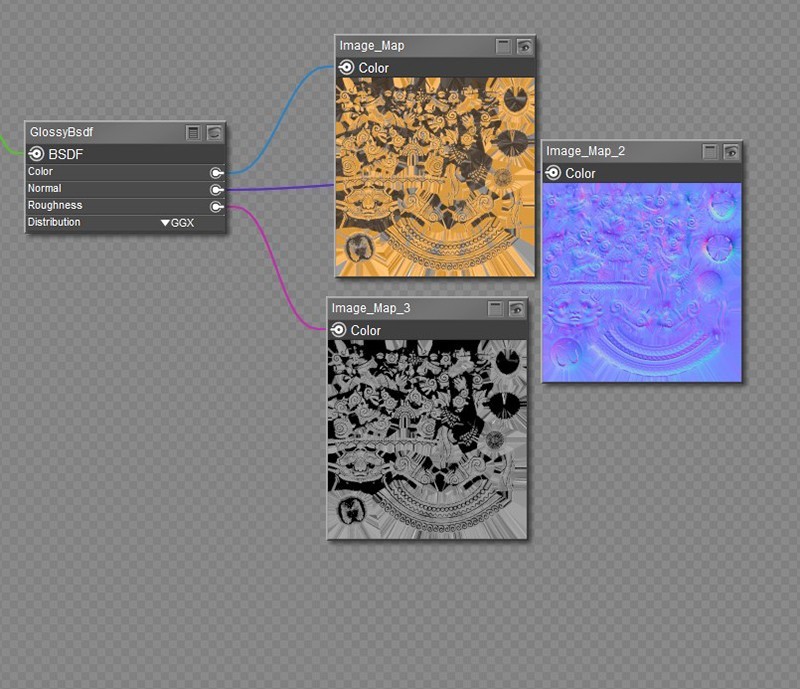
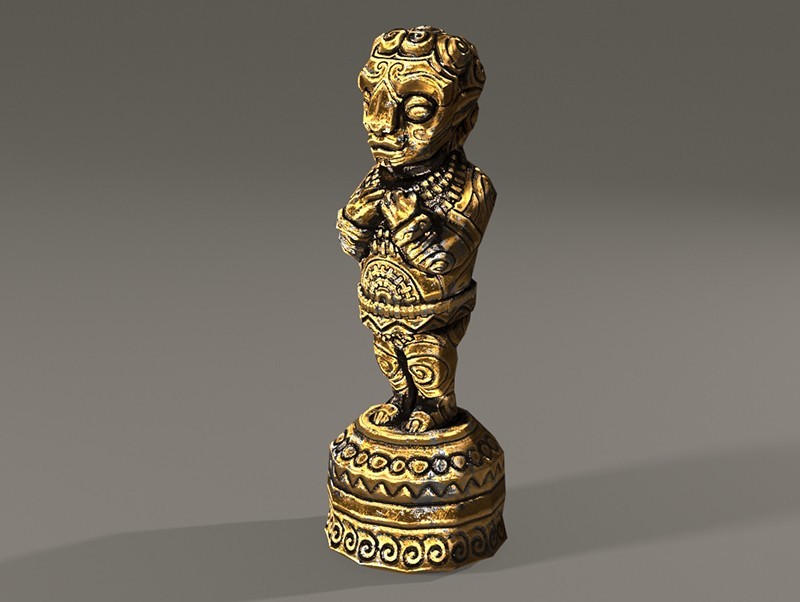
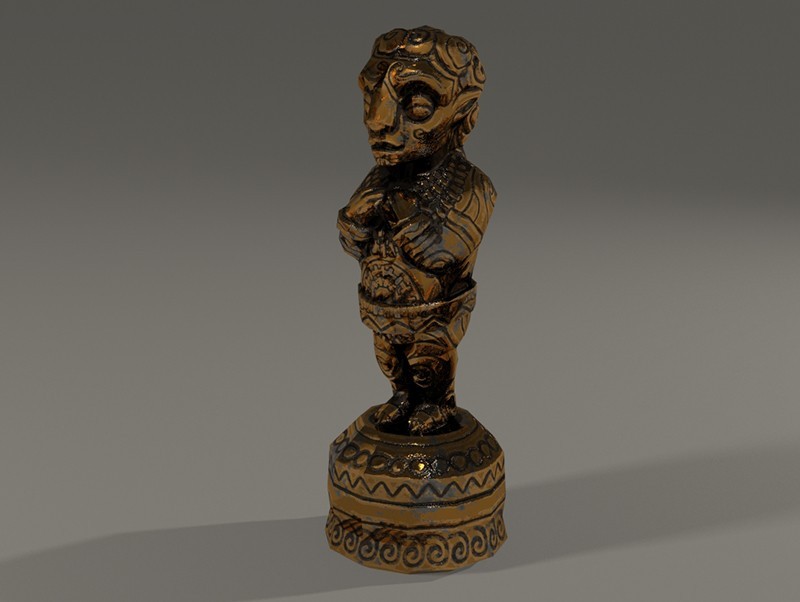
The final image is a very good result with little work. From here, you can experiment with other values, and plugging the textures in other inputs to see what you get. And, when you master the basics, you can move on to more complex materials.
While in this case, the PhysicalSurface material looks better than CyclesSurface, that doesn’t mean one is better than the other. Using one or the other will greatly depend on the material and look you are after. This is why it’s a good idea to learn to use both.
Which are your favorite Poser 13 features? What kind of work do you do with Poser? Share your thoughts in the Poser forums!
 Nemirc, aka Sergio Rosa, is a freelance graphics technology reporter and video game creator/developer. He has been working and creating in 3D for over two decades. He loves movies and writing as well. Nemirc was introduced to 3D from one of the very first versions of Poser.


