.png)
Good lighting is a key element of getting any scene to look right when you render it. Lights can add mood to your scene, highlight colors, reveal cues in forms, enhance muscles, cast shadows, the list is endless. Lights can also help you create effects. For example, you could add a reflection map to an element in your scene, causing it to direct light back at the source.
Using HDR lights is the most important way to get great renders from SuperFly.
About lights in Poser 12
Poser allows you to create four types of lights: infinite, point, spot and image-based. Each light has customizable characteristics, such as rotation and revolution positions, color, and intensity. You can turn lights on or off, adjust how the brightness diminishes as you reach the edge of a light’s range, and specify whether a light casts a shadow. You can also animate lights to create effects such as lightning or flickering streetlights. By default, Poser scenes include three infinite lights.
As with any other Poser object, you can parent lights to scene elements to have the light move as the source element moves. When you add, remove, move, or adjust lights, the Document, Light controls, and the selected light’s parameter dials automatically adjust to show the light’s new position/properties, allowing you to preview your changes in real time.
One feature of Poser 12 is the ability to use an HDRI on a background object, including mesh lights. This allows users to create HDRI lights.
Different HDRIs give off different Exposure Values. These ranges can result in different exposures for images with low Exposure Values resulting in dull images with little shadows or highlights, while more Exposure Values give renders sharper details.
Brian Morton, a.k.a., Ghostship2, explained how he uses HDRI lights.
Using HDR lighting, the scene gives you real shadows and highlights from the HDRI and renders with less noise than using a dome, Morton said.
Before Poser 11, he used Bagginsbill's "Envirosphere" to light his scenes by loading a 360 degree .jpg or HDRI onto the sphere's mat and set the ambient level to 1 or more.
"This totally immerses your figure into the background and makes them look like they really are there in that image. There are some issues using a 'lighting dome' like this, render noise, no bright highlights from the sun in the HDRI," Morton said.
Now Poser 12 allows users to use an HDRI on a background object, including mesh lights.
"You can get to this by going to your material tab, click on the object select drop-down menu and select 'background.' It shows up just like your figures and props do in the scene. The setup is a little more complicated than the dome lighting," he said.
Below Morton shares how he uses HDR lighting to create amazing, life-like renders in SuperFly.
RELATED: Poser Creator Series: How Blender tutorials made Brian Morton a better Poser Creator
How to use HDR lighting
There are several ways to use HDRI (high dynamic range images) to light your scene in Poser. The most common way in the past was to paste the HDRI onto the inside of a giant sphere or dome surrounding your scene. Crank up the ambient value for the sphere, and you'd have a sort of soft ambient light.
But Poser 12 allows you to use its Background object much the same way Blender uses an Environment node for lighting.
There are a couple of advantages for using this instead of the dome/sphere method. Firstly, using the background object as your light source renders with less noise than using a dome. Secondly, the Background will also cast bright highlights and sunlight from "lights" and sun in the HDRI images. Your figures and props will also cast proper shadows into the scene.
To set this all up, first you would want to delete all Poser lights from the scene, so they do not interfere with your lighting. You might want to check out my Poser 12 lighting resource in the Renderosity MarketPlace. It has a utility light set that lights your scene, so you can work, but does not light the final render.
After that, you may want to delete or hide the default GROUND prop if you want to see the HDRI in your scene. You can leave the GROUND prop there if you want. Light will pass through it, but you won't see any environment from the HDRI.
Go into the materials room and select the Background object.
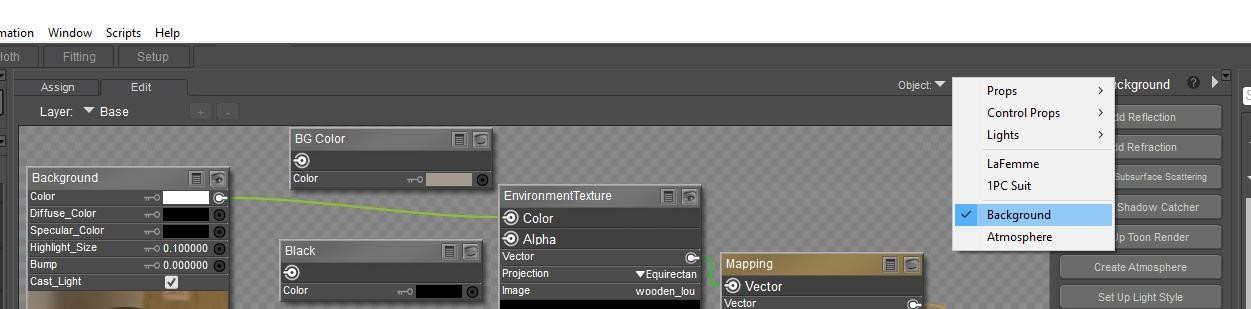
Then set up your background material shader as follows:
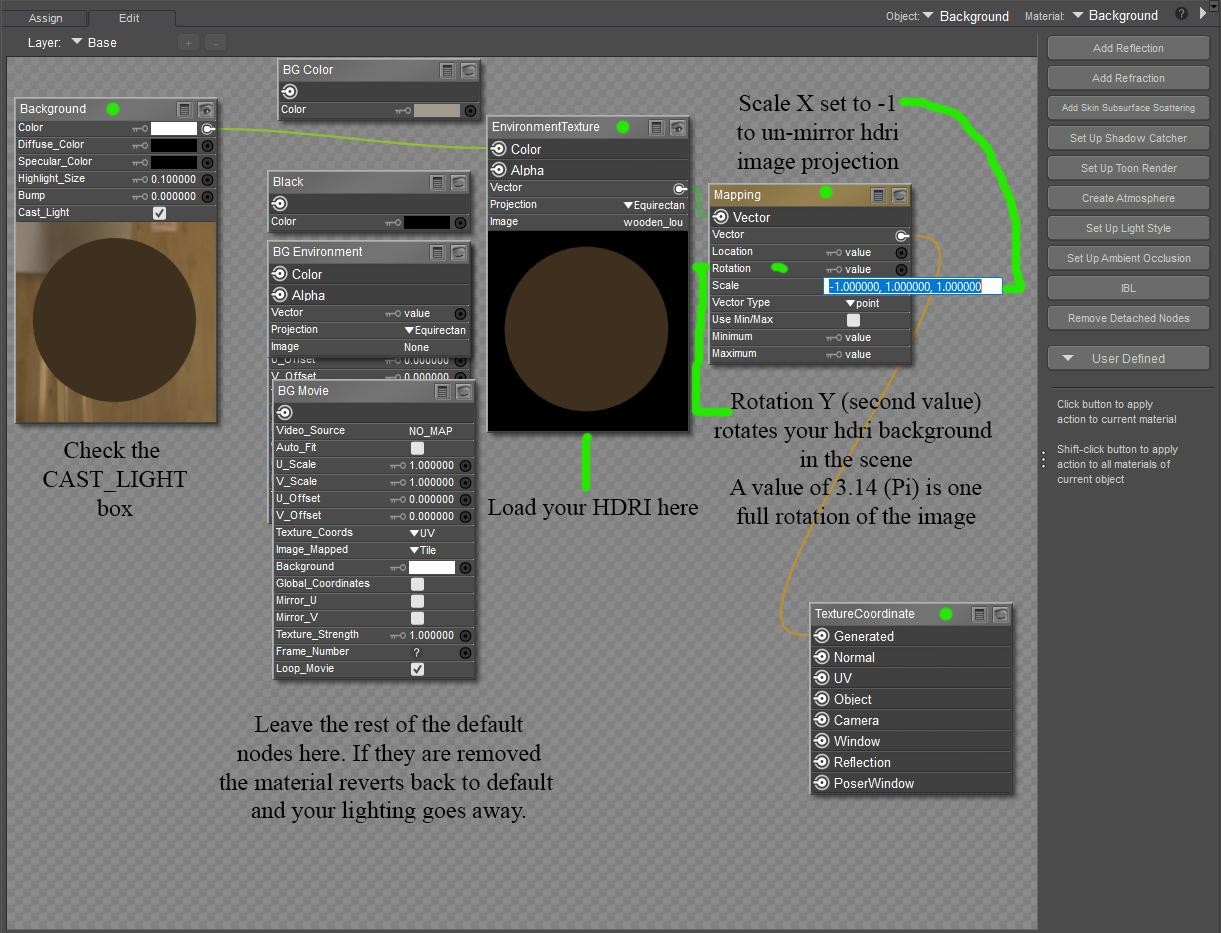
Leave all the default nodes where they are and DO NOT DELETE THEM. If you delete these nodes, your material will revert to default once you close the material room, and you will be sad.
Set the X scaling value of your mapping node to -1. This reverses the mirror projection of the node, so things will be correct in your scene.
To rotate your HDRI, use the middle (Y) value to rotate its orientation. This will be important if you want to change the direction of sunlight on your figures.
You will only get dynamic lighting and sunlight from dynamic HDRIs. Some have low dynamic range or depict overcast days and will look as they should. You can still use standard JPG's to light a scene, but they will not have any highlights and not cast shadows.
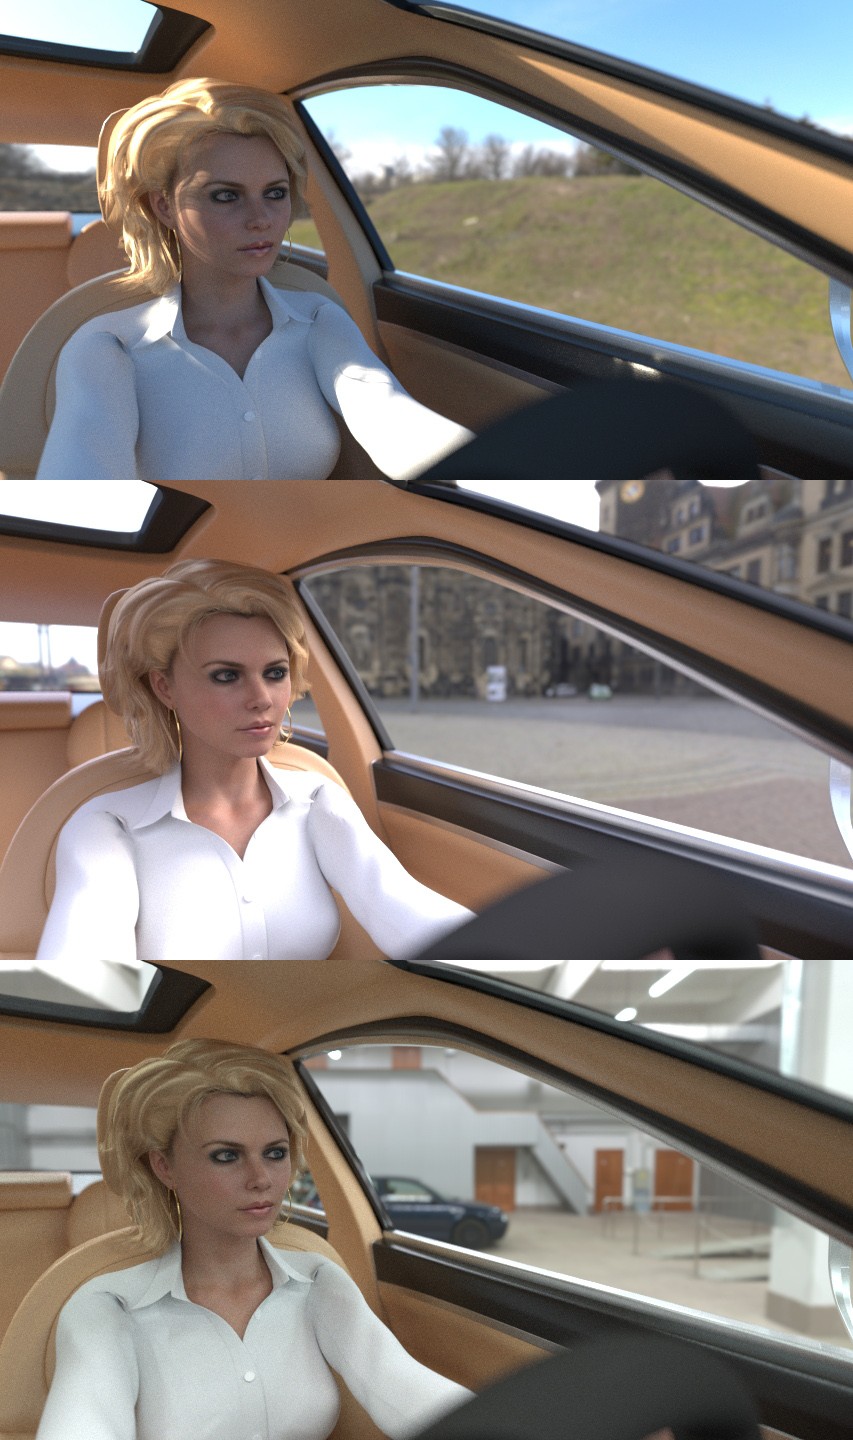
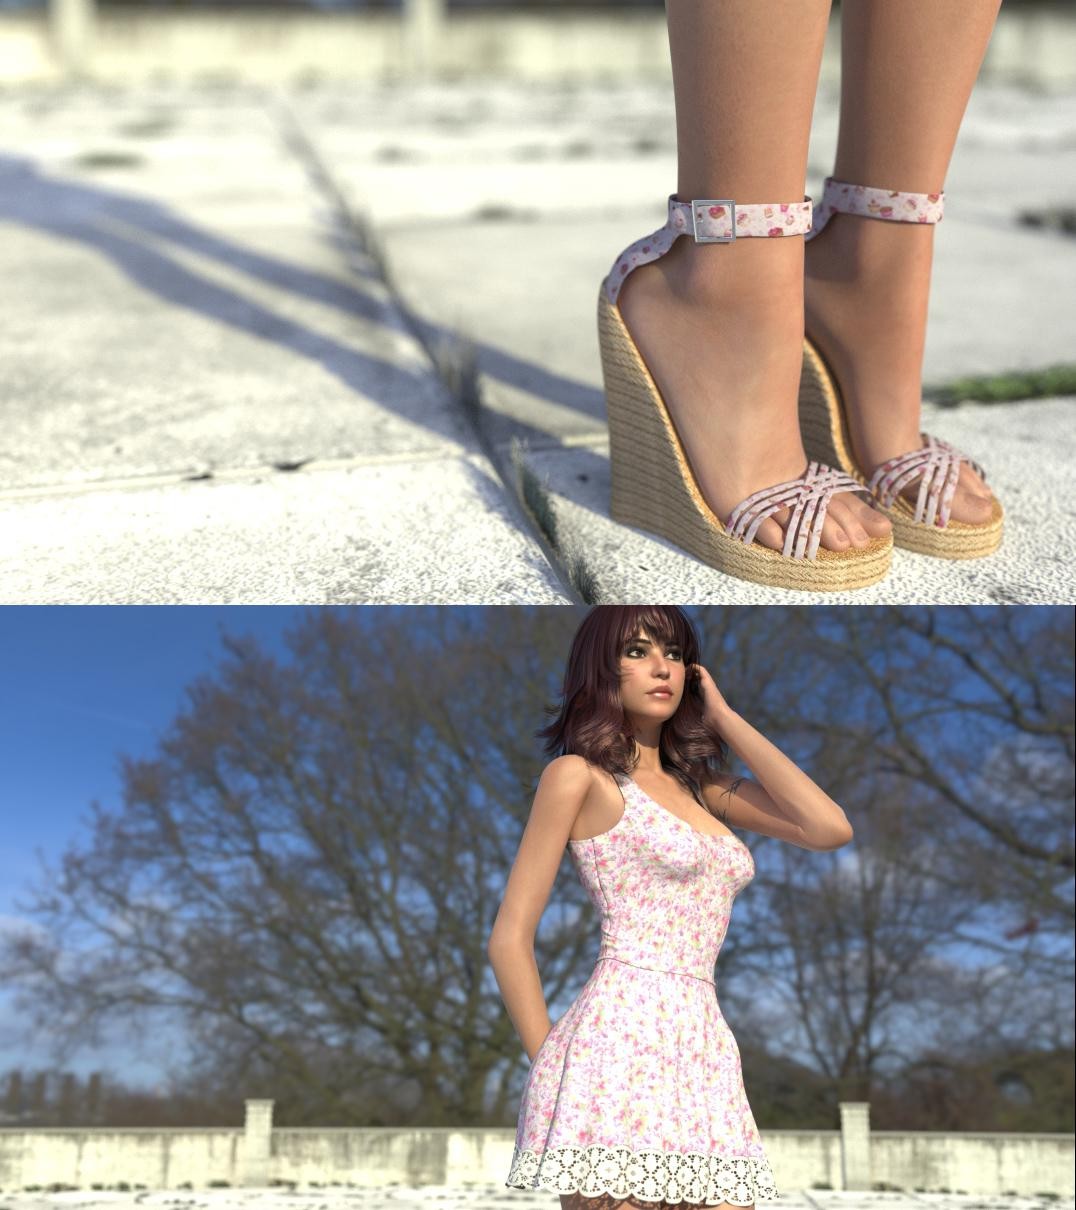
Some examples of this lighting.