.png)
Creating Custom Materials the Easy Way in Poser 14
If you’ve ever wanted to build your own custom material but weren’t quite sure how to use ready‑made texture assets, Poser 14’s Simple Tab in the Material Room is about to become your new best friend. It’s a fast, approachable way to get realistic, physically accurate textures into your scene — no stress required. Follow along and you’ll be creating beautiful, believable surfaces in no time.
Choosing Your Texture Assets
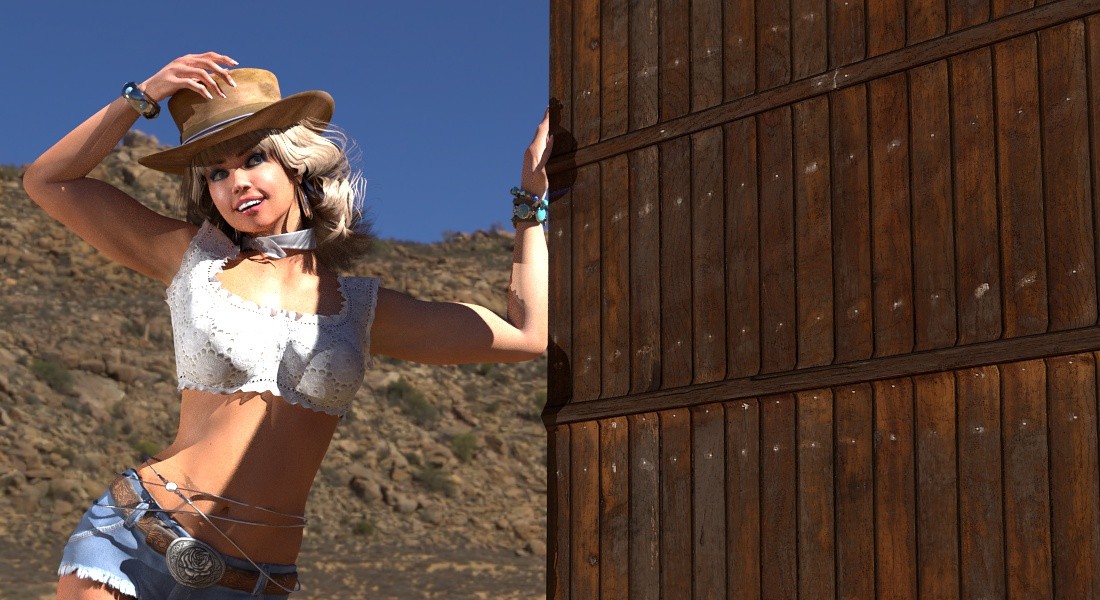
For this walkthrough, we’re using free textures from Poly Haven. It’s worth taking a moment to explore their downloads so you know exactly what maps you’re getting. Our example uses the Wooden Gate texture set, but the process is the same no matter which asset you choose. Different packs may include different maps, and that’s perfectly fine — Poser’s Simple Material editor can handle whatever you bring in.
Picking the Right Prop
We’re applying the material to the Hi‑Res Square (also known as the Cloth Plane). This prop is ideal because it handles displacement especially well, giving you more realistic surface depth. Especially with Superfly renders you may want to subdivide props further for even more enhanced displacement.
Getting Started in the Simple Tab
Select your prop.
Head to the Material Room and switch to the Simple Tab.
If you’ve ever wanted to build your own custom material but weren’t quite sure how to use ready‑made texture assets, Poser 14’s Simple Tab in the Material Room is about to become your new best friend. It’s a fast, approachable way to get realistic, physically accurate textures into your scene — no stress required. Follow along and you’ll be creating beautiful, believable surfaces in no time.
Choosing Your Texture Assets
For this walkthrough, we’re using free textures from Poly Haven. It’s worth taking a moment to explore their downloads so you know exactly what maps you’re getting. Our example uses the Wooden Gate texture set, but the process is the same no matter which asset you choose. Different packs may include different maps, and that’s perfectly fine — Poser’s Simple Material editor can handle whatever you bring in.
Picking the Right Prop
We’re applying the material to the Hi‑Res Square (also known as the Cloth Plane). This prop is ideal because it handles displacement especially well, giving you more realistic surface depth. Especially with Superfly renders you may want to subdivide props further for even more enhanced displacement.
Getting Started in the Simple Tab
Select your prop.
Head to the Material Room and switch to the Simple Tab.
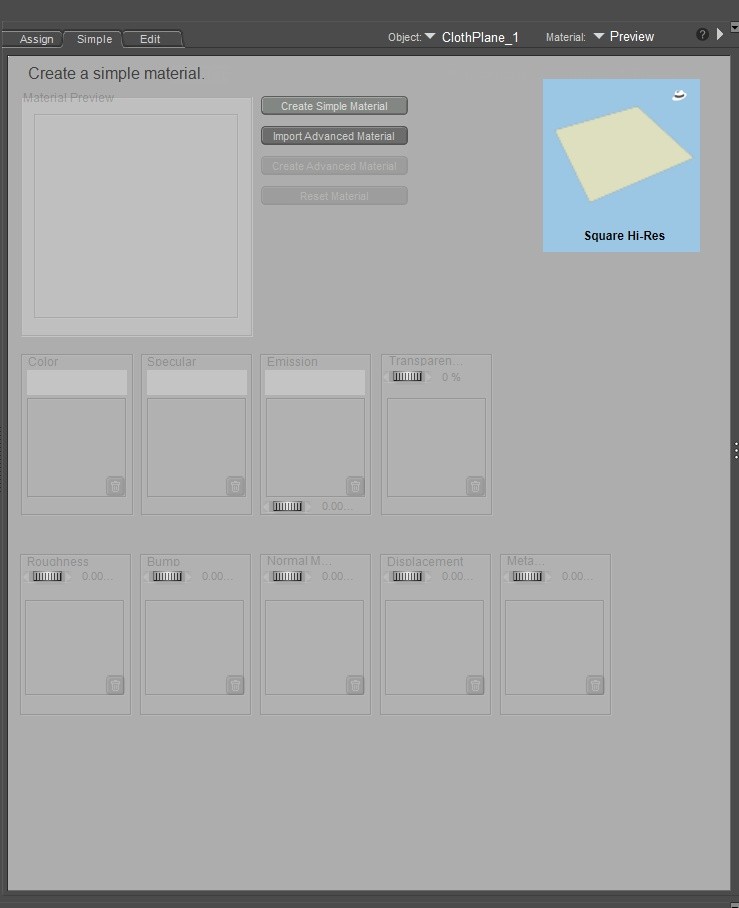
Click Create Simple Material to activate all the editable fields.

Once activated, you’ll see familiar texture slots. Most naming conventions are universal, though the Color map may appear as Diffuse or Albedo depending on the creator. And remember — you don’t have to fill every input.
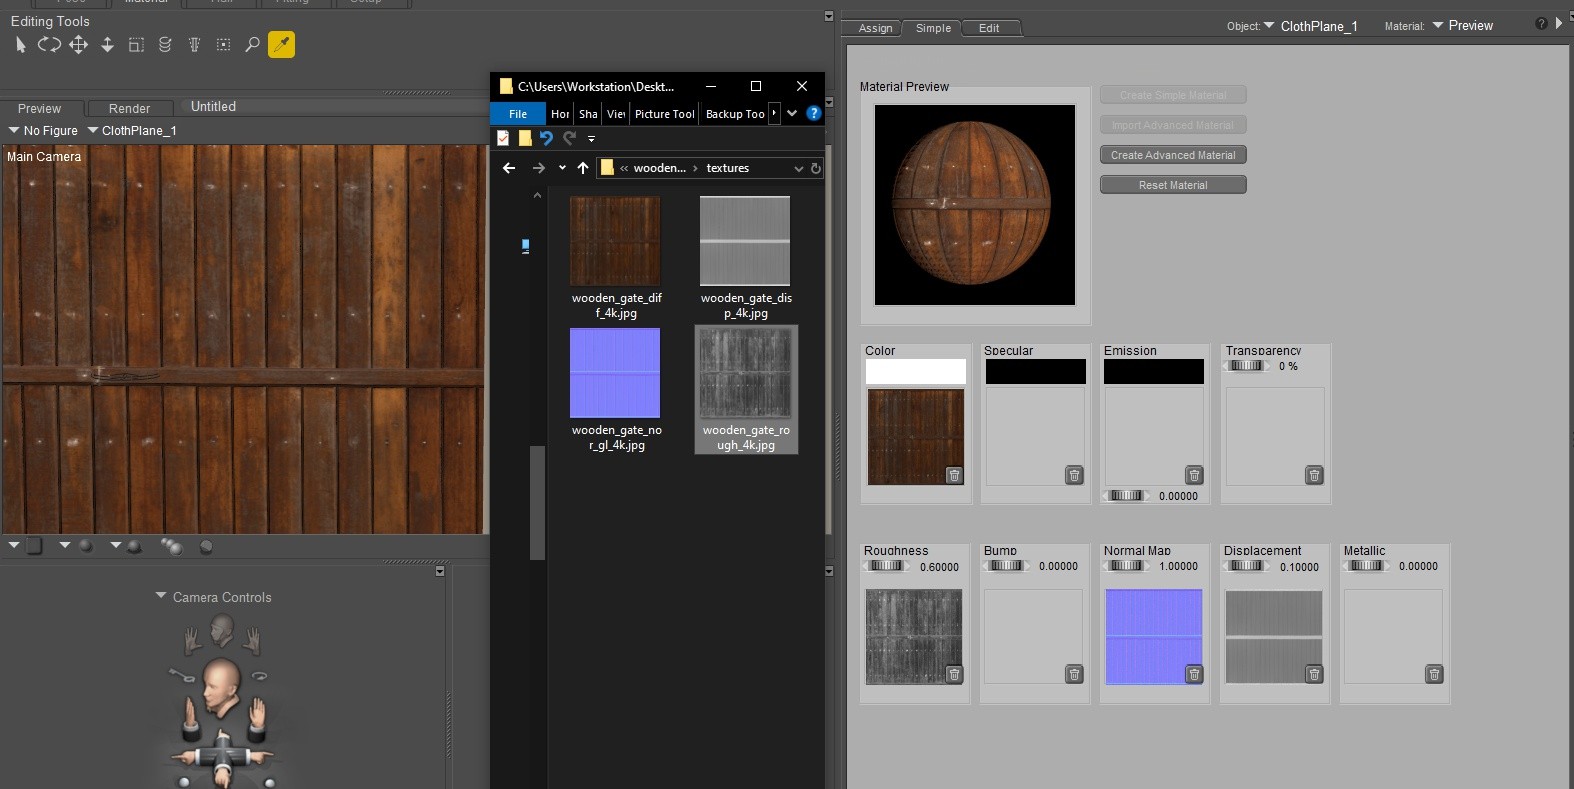
Drag, Drop, Done
No need to hunt through node trees. Simply open the folder where your textures are stored and drag each file directly onto its matching slot.
For this example, we used:
Color (labeled _diff)
Roughness
Normal
Displacement
Drag, Drop, Done
No need to hunt through node trees. Simply open the folder where your textures are stored and drag each file directly onto its matching slot.
For this example, we used:
Color (labeled _diff)
Roughness
Normal
Displacement
Understanding the Key Settings
Roughness
Roughness controls how shiny or matte your surface appears.
Lower values = shinier
Higher values = more matte
We used 0.65, but you can go all the way up to 1.000 if you want zero shine.
Roughness
Roughness controls how shiny or matte your surface appears.
Lower values = shinier
Higher values = more matte
We used 0.65, but you can go all the way up to 1.000 if you want zero shine.
Note that since Roughness in effect controls Specularity, there is no need to have both except in cases where there is a particular Specular map that's best to use.
Bump / Height
This asset didn’t include a Height map, but if it had, you’d place it in the Bump channel. Start with a low bump strength and increase gradually. Objects closer to the camera often need subtler bump values.
Normal Map
Normal maps typically work best at 1.000 for full effect.
Displacement
Our displacement value ended up at 0.1000 after some experimentation. Like bump, this is personal preference — adjust until it looks right for your scene.
Want More Control? Switch to Advanced
Once your Simple Material is set, you can click Create Advanced Material and move to the Edit Tab. You’ll see a more detailed node setup that you can fine‑tune as much as you like.
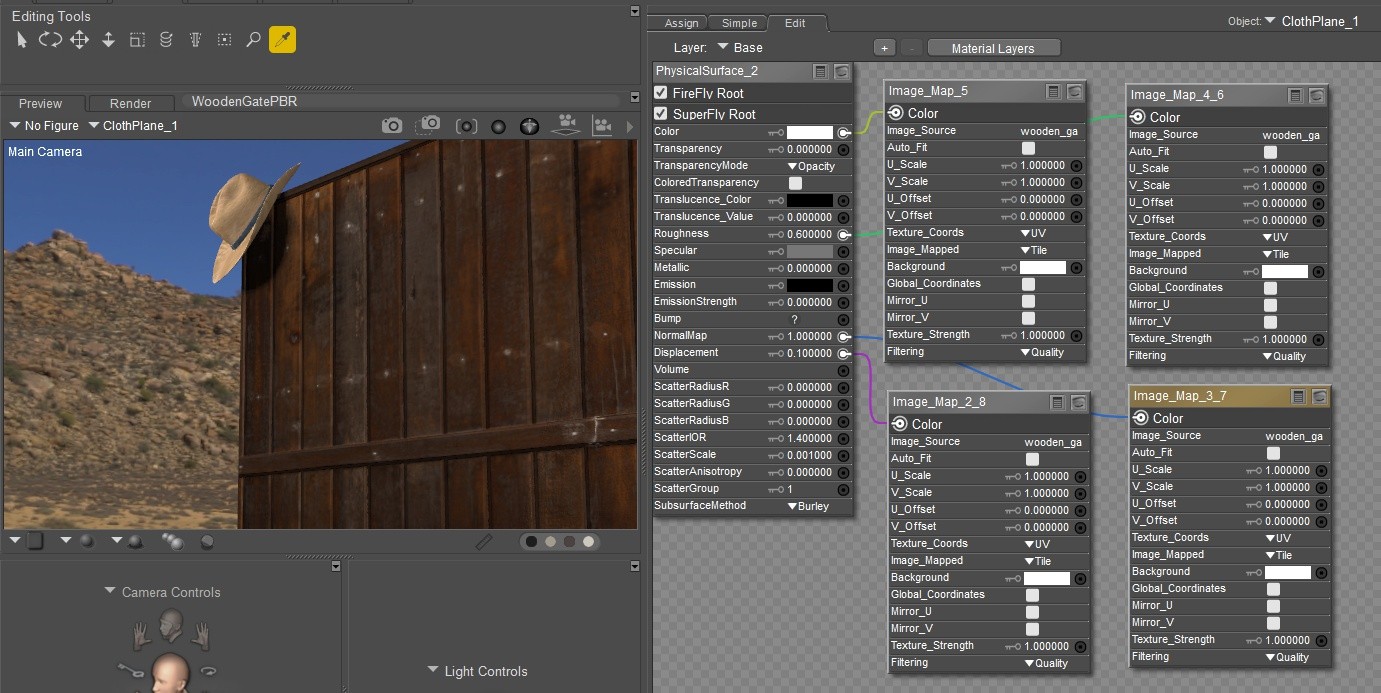
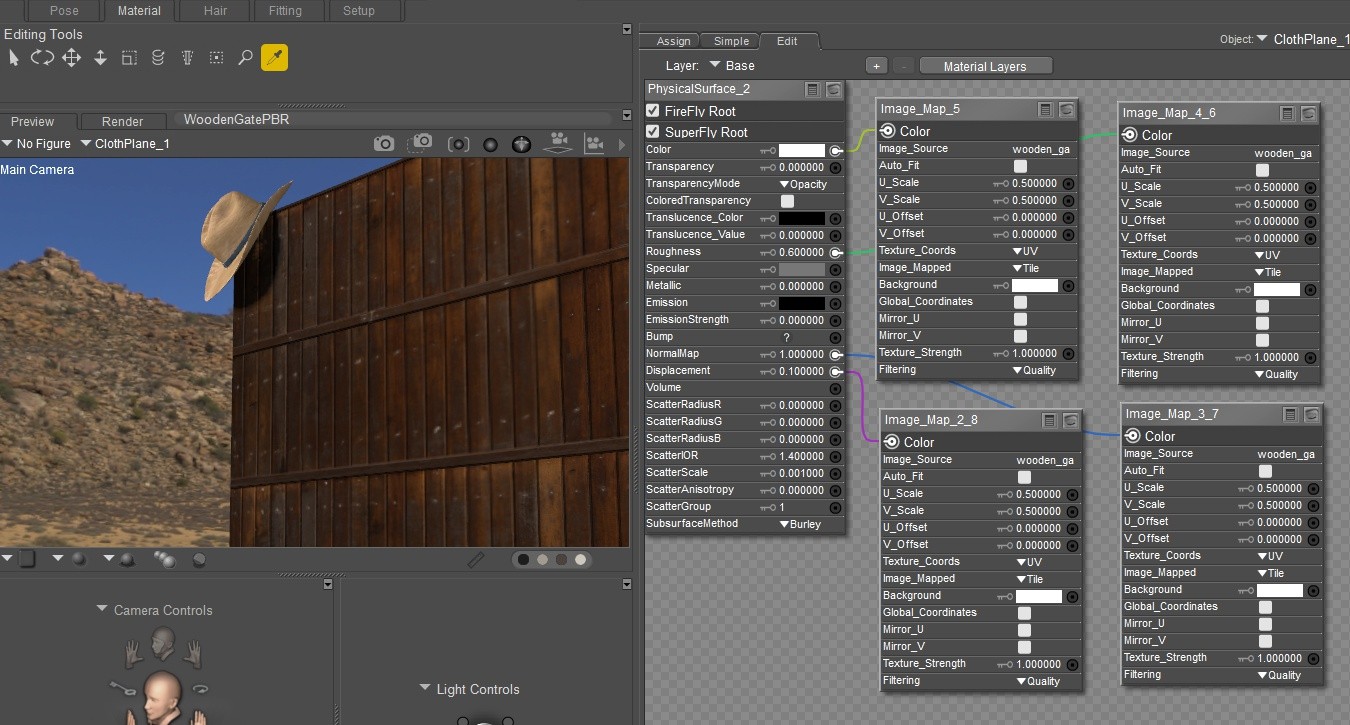
A great beginner tweak is adjusting U_Scale and V_Scale to change how your texture tiles.
For example, lowering the default 1.000 to 0.5 makes the texture repeat more often, giving you tighter, more realistic detail.
For example, lowering the default 1.000 to 0.5 makes the texture repeat more often, giving you tighter, more realistic detail.
Have Fun With It
Don’t let new terms or settings intimidate you. The Simple Tab is designed to make PBR materials approachable, playful, and rewarding. Experiment, explore, and enjoy the process — your renders will absolutely show the difference!
Don’t let new terms or settings intimidate you. The Simple Tab is designed to make PBR materials approachable, playful, and rewarding. Experiment, explore, and enjoy the process — your renders will absolutely show the difference!